We upgraded from our 21′ Winnebago Micro Minnie travel trailer to a 30′ Jayco Jayflight Baja edition travel trailer. The first few times towing the Jayco, we experienced some trailer sway that we never had before which sent me on a mission to find the best trailer hitch out there.

Table of Contents
Our First Trailer Hitch
For the Micro Minnie, we bought a Blue Ox Sway Pro hitch, which is a quality weight distribution hitch that also is anti-sway. However, going from the 21′ foot trailer to the 30′ trailer, we also added about 2,000 pounds as well as a foot wider and almost 2 feet taller. This increase in size is what made me really feel the trailer behind me with a few times being a bit scary. White knuckle driving is no fun!
I tried making the Blue Ox work as I bought heavier duty weight distribution bars, but even after that, I still had some sway problems. My first step was to weigh our trailer to be sure I was in the weight capacity of the trailer as well as what our Chevy Express 3500 van can handle.
Taking it to the nearest CAT Scale told me that we were a bit heavy on the tongue weight. But everything else was within the weight rating of the trailer and the towing capacity of the van. To move some weight off the tongue, I took our tongue mount bike rack and moved all the bikes to the bumper mount bike rack of the trailer. This didn’t make much of a difference, but did help with porpoising. Which is the up and down bouncing the van and trailer would do when hitting a bump.
I jumped on Google and started looking into sway problems and ways to fix them. I found many different brands of tow hitches, everything from Draw Tite to Husky to Equal-i-zer, but they all worked on the same principle of using friction to control sway.
The Best Trailer Hitch On The Market
Then I found the ProPride 3P Hitch, which looked and functioned way different than any others that I found. Reading up on it, they claimed to not just prevent sway, but eliminate trailer sway all together. What?! How can that even be possible? Well, the physics of it says it can, the reviews were fantastic and I was desperate, so I had to get one.
Swaying happens because there is a pivot point at the tow ball of your vehicle. This is where the trailer coupler attaches and pivots on so you can make turns. The problem comes in because that pivot point means the trailer can move side to side behind the tow vehicle when an outside force is applied to the trailer. Things like cross winds or a semi passing you.
Normal anti-sway hitches use friction to stop the trailer from moving side to side. By basically putting a heavy duty sway bar on either side of the trailer hitch ball to hold it in place. This works a lot of the time, but sometimes the friction is too little or too much and the trailer can still sway.
ProPride’s design eliminates the pivot point at the hitch ball. The main hitch unit goes onto the trailer’s coupler and is then locked in so it cannot pivot. Their patented term of Pivot Point Projection is applied and moves the pivot point forward near the tow vehicles rear axle.
Whoa, that’s pretty technical and still a bit hard for me to understand, but trust me, nothing is pivoting with this hitch.
How Do You Turn?!
Ok, so if nothing is pivoting, how the heck do you turn? Good question. Turning is pretty important when driving and towing a trailer, right? Well, the way it works is when a turning force is being applied from the front, the hitch will sort of “shift” that way and the trailer follows. It’s pretty impressive. Check out ProPride’s FAQ page for more details as I only sort of understand the science. I just know it works.
The Hitch
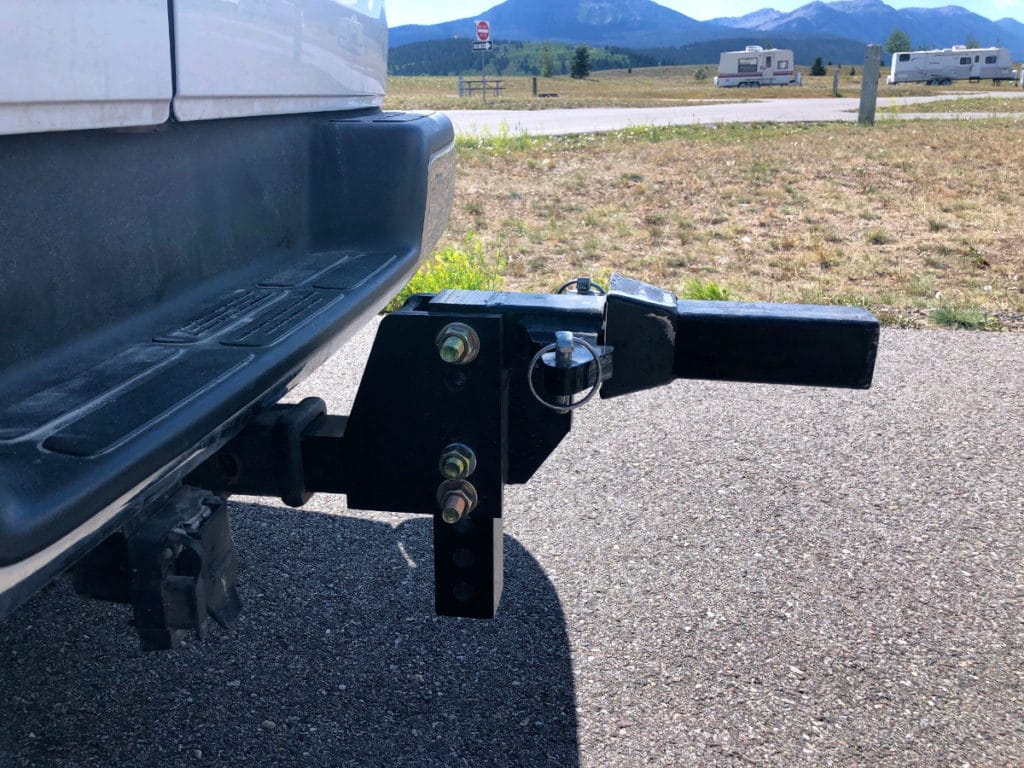
The hitch is made up of several different components all with with a fantastic powder coated finish. There is a hitch bar (also called the Stinger) which is the part that goes into your tow vehicles hitch receiver. The stinger is adjustable so it will work with any height difference between your tow vehicle and your trailer.
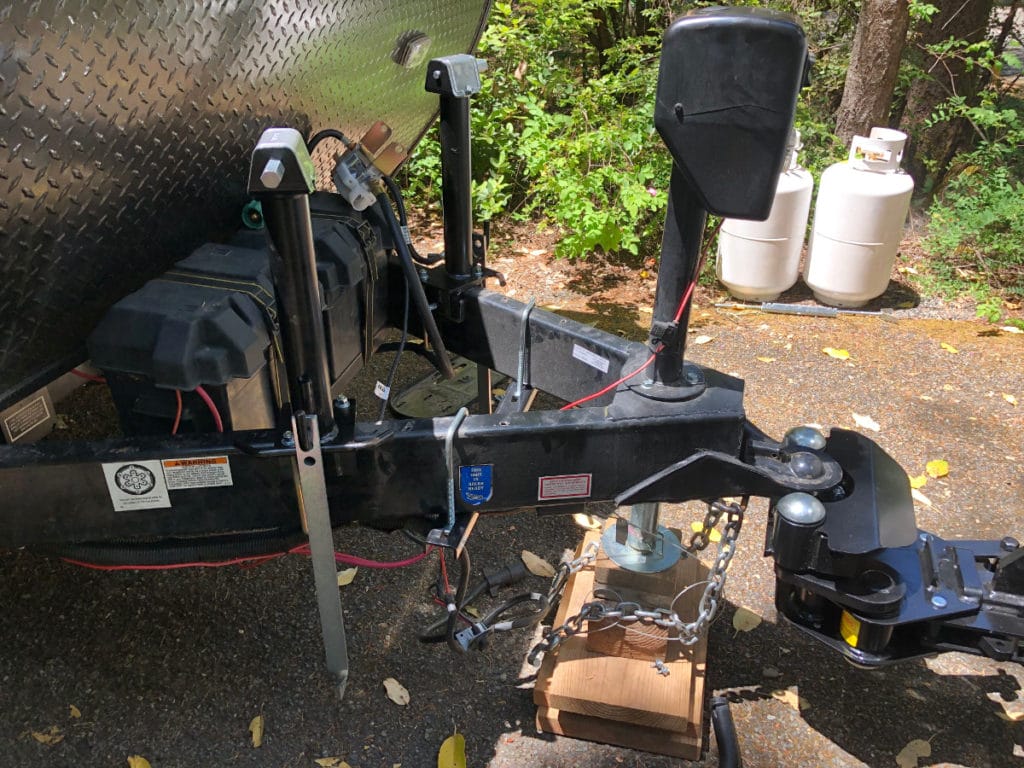
Next there is the main hitch unit, which is what couples to your trailer. This part almost looks like a 5th wheel hitch and has a large hitch box opening in the front where the stinger goes and latches into.
Then there is the yoke. This part goes under your trailer tongue and locks the main hitch unit from pivoting.
Last, there is the weight distribution jacks and bars. The bars stay permanently fixed to the trailer and can be adjusted by the jacks so you can control how much weight is distributed to your tow vehicle.
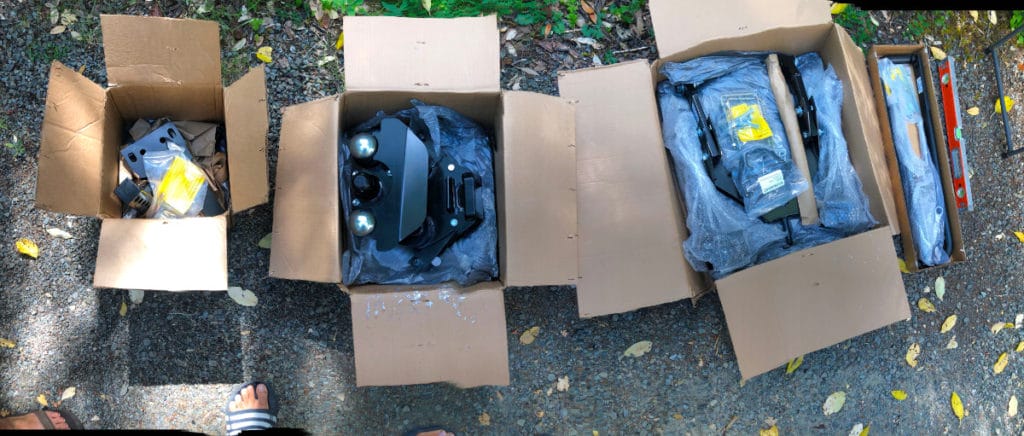
When ordering this hitch, it comes in 4 large boxes. Each way about 50 lbs, just so you are aware. The entire hitch weighs about 200 lbs, which is quite a lot, but shows the quality of the hitch.
Installation
There are mixed reviews on installing the ProPride 3P hitch. Some said it was very complicated, others said it was straight forward and only took a few hours. I’m decently handy and had help of a couple of friends camping with me, so I was curious to see how difficult it would be and how long it would take.
I won’t go through every detail step by step because ProPride sends an excellent instruction booklet that is very detailed. I will just talk about some of the experience of installing each part of the hitch.
I’d also recommend watching the Youtube videos out there on the installation. There are several out there and I watched all of them. I felt very prepared when I started and knew what to expect.
I put together a video of my installation that you can check out here:
Tools Needed
ProPride sends along a breaker bar with a 15/16″ socket, which is used to latch the hitch bar into the main hitch unit, but this is also used for installation.
They also send a ratcheting 3/4″ wrench which is used for various things during the install.
There are a couple things that I did not have when doing the install. Which may save you a trip to Home Depot if you have it before hand. There are several different torque specifications called out in the install guide, a couple with some pretty heavy duty settings. I didn’t have a torque wrench, so I picked up a big one at Harbor Freight for about $70. Another thing I needed was a 1-1/8″ socket to tighten the yoke bolts. I didn’t have that size, so had to run to pick it up.
Some larger washers will be useful to have. I needed them because there is a u-bolt that goes right over where the propane tank tray sits. The washers can be used a spacer when putting the tray back in.
I also needed some heavy duty safety hooks to replace the safety hooks I currently had. ProPride can send along an extension for the safety chain. Which may be needed to get the chains to reach the truck, but I had the S hooks on mine, which I wasn’t able to bend enough to get the chain out of. I ended up cutting them off and using other hooks I got at a tractor store.
Other than that, just various sockets and wrenches are needed in all the common sizes as well as other hand tools, electric drill, etc. that you most likely already have.
Prep Work
Before starting the install, you will have to remove any hardware that is attached to the trailer’s tongue from your current hitch if any. You will also have to remove the propane tanks and most likely the tray they sit on. For me, it was held down by 4 self tapping screws, so it was an easy removal.
You may also need to remove other things that may get in the way like a solar plug, emergency trailer brake plug, etc.
Hitch Bar
Setting up the adjustable hitch bar may the most difficult step in the whole installation, just because this is different for every tow vehicle/trailer height. This involves getting the trailer and tow vehicle on flat ground and as level as possible. Sounds easy, but when camping, it isn’t. I set up my hitch bar then had to readjust it completely when we got to a level/flat site.
The cool thing is the since the hitch bar is adjustable, it wasn’t a big deal and can be reset if we ever get a different tow vehicle.
Weight Distribution Jacks
Installing the weight distribution jacks is very straight forward. All you have to do is measure 26″ from the center of the coupler, place the jack in that location and use the u-bolts to tighten them down.
You will most likely hit the propane tray at the 26″ mark, but ProPride says you can deviate from that 26″ mark up to an inch and a half. So I installed mine at 27.5″ from the center of the coupler and it works just fine.
Frame Bar
The frame bar mounts under the trailer tongue and holds the yoke in place (spoiler alert!). The bar is mounted by 2 u-bolts that sit over the frame of the trailer. This is where the propane tray usually sits, so having some sort of space for the propane tray, like the washers I talked about, is needed.
This part is best done with another person since the bar itself is pretty heavy so holding it up while threading the nuts on the u-bolt would be tricky and frustrating.
Main Hitch Unit
Next is putting the main hitch unit on. For this, you actually hitch it up to your tow vehicle. Back up to your trailer and lower the trailer’s coupler onto the hitch unit.
Pretty straight forward, but make sure you grease the hitch ball on the main hitch unit really good with some high temp grease. There’s a lot of friction going on at that point while bouncing down the road and a squeaky hitch is just annoying.
I’m pretty sure it will fit on most ball sizes, but check when ordering if you are unsure.
Yoke
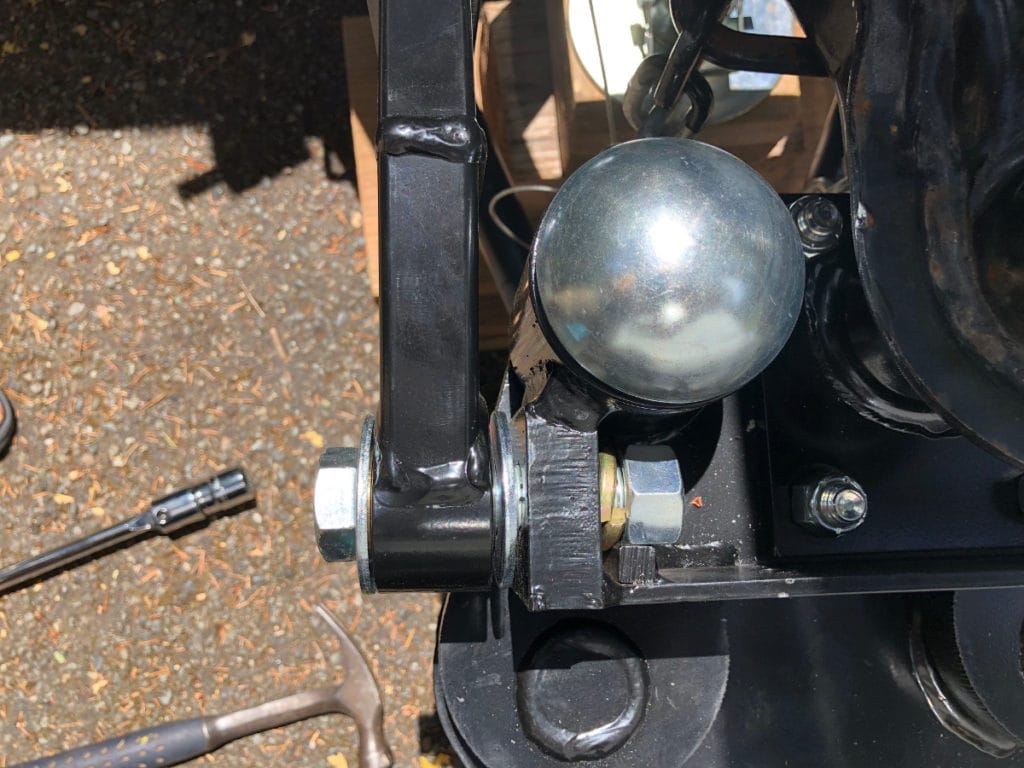
After the main hitch unit is coupled to the trailer, the yoke can go on. The yoke slides into the frame bar then bolts to the main hitch unit. This is how the pivot point is eliminated as the yoke prevents the hitch from pivoting.
This install is pretty straight forward as well, just be sure to have the 1-1/8″ socket handy and make sure the bolt, washer and locking washer are put in the right order when bolting it to the main hitch unit.
Weight Distribution Bars
Lastly is the weight distribution bars. These bolt into the underside of the main hitch unit then attach via a spring bar link to the Weight Distribution Jacks. Straight forward step again. Just be sure not to lose the little disc that holds in the bars to the main hitch unit.
Also, grease up the ends of the bars that go into the main hitch unit. This is another friction spot that needs to be lubricated. There are some Zerk fittings here to regrease in the future.
Adjustments
Once all of the components are installed and torqued to spec, you’re good to go! For a while… You may notice a few things after your first couple of trips that need to be adjusted or tightened.
For me, it was the hitch bar needed to be raised so the trailer would sit level when on level ground. I tow with a van. Which has a a pretty low receiver and a Baja edition trailer, which rides pretty high. I was able to find the right combination to get the trailer level when hooked up.
The weight distribution jacks can be adjusted accordingly to get the right amount of weight transferred to the front of your tow vehicle. Sean at ProPride said on average, the jacks are raised 7-8″. I found 7″ is about right for me.
I re-torqued all the bolts after the first few outings just because I know how things can rattle loose when in motion. This is probably a good idea to do.
Overall, the install took me about 8 hours. However, this included 2 trips into town which was a half hour away – so 2 hours of going to the store. I wasn’t rushing through the install either because I wanted to be sure it was done right. If I had to install it again, I’d probably get it done in less than 4 hours.
Hitching
Now that you’re all set up, I should talk hitching up. This can be super easy…or not so much. How easy it is depends on how you unhitched the last time. If you’re level and flat with the trailer and tow vehicle, then it will be no problem! Just line up the stinger with the hitch box, back in slowly and that should be it.
Once the stinger is mostly in, to the point you can get the Over Center Latches into the notches on the stinger. You use the breaker bar to snap in the Over Center Latches and put in the hitch pins on the stinger.
Then you raise the weight distribution jacks to the proper height, plug in your wiring harness, connect the safety chains and you’re ready to roll.
The difficulty can come in when you are not on level ground and the trailer is either quite a bit above or below the tow vehicle. If this is the case, you can use the weight distribution jacks to tilt the hitch box to line up with the stinger.
Unhitching
Unhitching is pretty easy, but can be a little unnerving if not done correctly. The way it is done is to back in to your site. Get your trailer as level as possible. Chock everything in and put on your emergency parking brake on your tow vehicle.
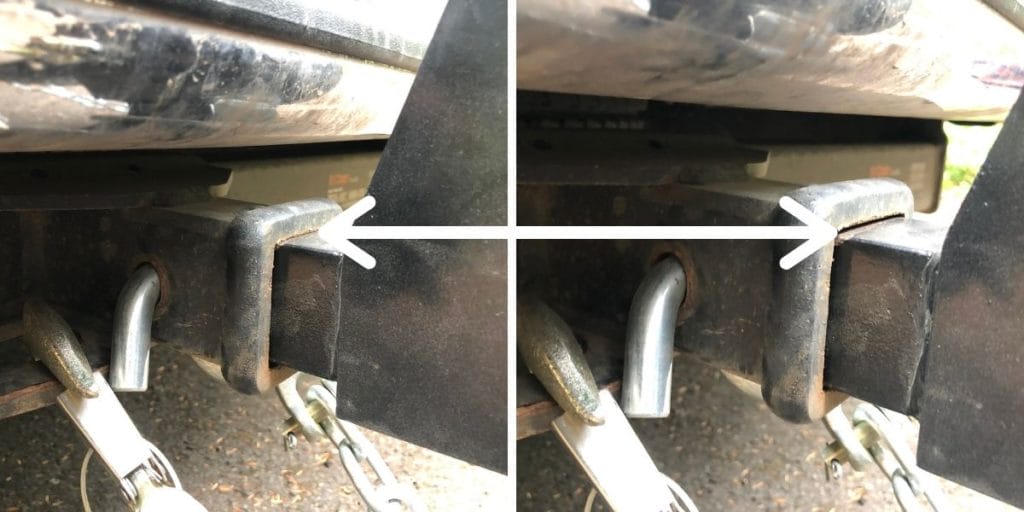
Put down your tongue jack to release tension from the weight bars and loosen the weight distribution jacks all the way. Then retract the tongue jack until you see an equal gap on the top and bottom of the end of the stinger that goes into your tow vehicle. Also check that there is an equal gap on the other end of the stinger that goes into the hitch box.
This may be hard to tell, but if you’re looking at it while you’re retracting the tongue jack, you’ll see it happen. Once this is the case, you know you’re in a neutral position and the stinger can come out easily.
Next, you pull the pins from the stinger and use the breaker bar to unlatch the Over Center Latches. At this point you can slowly pull forward to get the stinger out.
If the stinger isn’t in a neutral position, pulling out may be difficult as the stinger is hung up in the hitch box. Also when you finally get out, the hitch will fall pretty hard to a neutral position. It’s happened to me before, nothing was damaged, but it scared me pretty good.
As I said before, if you can get a nice neutral position to unhitch from, hitching up the next time will be just as easy.
Customer Service
When reading about ProPride and the fantastic product they sold, I read quite a bit about their excellent customer service. I can vouch that this is completely true. Sean at ProPride is fantastic – even giving out his personal phone number on their website.
I had several questions when ordering and he answered them super fast with exceptional detail. I also had a heck of a time figuring out where to ship the hitch to since we travel full time. And getting 4 50lb packages is usually frowned upon at campgrounds. Sean worked with me until we found a place that was close to me and wasn’t a problem.
The after sale support I received was just as good as presale. Every question I asked was answered super quickly and until I understood what I had to do.
With this customer support, I have full confidence in their lifetime warranty.
Tips
I put some neon green tape around the opening of the hitch box. The powder coating on the hitch box is jet black, the same color as the stinger, so it was difficult to line them up correctly on my reverse camera. The tape helps me see the opening.
Another tip is to grease the stinger. This makes hitching easier when not lined up perfectly. I used the same high temp grease that I used on the hitch ball and weight bars. This just made a mess of my hands when I’d take it on and off. People have said spray silicone works just as well.
ProPride 3P Jim Hensley Hitch Review
Below we share our ProPride hitch review below. Sharing the Pros and Cons.
Pros
No Sway
This is a big one and the reason I went searching for a new hitch in the first place. Now, I wouldn’t say I don’t notice the trailer behind me or don’t feel any kind of movement. Because, let’s face it, it’s 7500 lbs and 30 feet long. It’s there. However, it has made a MAJOR improvement to the towing experience. We’ve been in serious crosswinds along the Oregon coast. I was able to easily navigate it with the ProPride hitch. If I had my old Blue Ox, I think I would have had to go 30 mph just to get through it.
The thing I notice with the sway is that it’s no longer the trailer swaying behind me. It’s more of the entire van and trailer moving as one and that is much easier to correct on the road.
Ease of Hitching/Unhitching
There is a caveat to this one. There is a learning curve to hitching and unhitching with ProPride. You have to get everything as level as possible. Notice the angle of the stinger, etc. But once you get all that down, it’s very easy to hitch and unhitch.
With my Blue Ox conventional hitch, I used to have to jump on the bumper of the van sometimes to get the ball to release from the coupler. Now, I simply unlatch the 2 Over Center Latches, and pull right out.
Everything Stays on Trailer
Pretty much the whole hitch stays on the trailer at all times. I don’t have to mess with taking the sway bars off anymore. I usually do take the stinger off of the van after getting to our campsite, just so it’s not sticking out when I’m driving around town, but I did that anyway with our old hitch.
Customer Service
I know I talked about this before, but it’s worth mentioning again as a pro for this hitch. ProPride stands by their product and offers a ton of help getting it set up right. They really believe in their product and it shows with how they treat their customers.
Heavy Duty Components
The quality of this hitch is amazing. It’s super heavy duty and I see this thing lasting as long as I have a trailer. There is a downside to this, however, because heavy duty also translates to heavy and I’m really close on my weight limits for the tongue so this didn’t help. I will continuously keep an eye on that to make sure I’m ok because this hitch is worth the weight.
Lifetime Warranty
Even though the components are top notch, let’s face it, I travel sometimes at 60 mph down the highway and there’s plenty of bumps along the way. The fact that the hitch is backed by a lifetime warranty makes me feel good about the purchase.
Cons
Weight
Like I said before, the weight of the hitch can be an issue if you’re close on weight limits. Trailers usually don’t have that high of cargo carrying capacity in the first place and usually when traveling you have enough stuff to hit that capacity. Adding in 200 lbs for a trailer hitch can be an issue.
Complicated Install
The installation was complicated enough that it needs to be mentioned as a con. The instructions sent were pretty clear and there are enough Youtube videos out there to give you a good heads up on what to do. But in the end it still is a pretty tedious process. That said, you could always take it to a dealership and have it installed.
Hitching/Unhitching Learning Curve
It took me several times of hitching and unhitching on different surface levels before I really got down this process. Even now I feel there may be a circumstance that will make hitching up difficult, but I feel much better about it now than I did the first time.
Another tip for hitching/unhitching, if you back in to a site at an angle, the hitch will shift to allow the trailer to turn. This may cause the sway bars to interfere with the tongue jack when you want to raise the trailer. A couple of things you can do to fix this is to loosen the weight distribution jacks fully or partially. This will release the tension on the bars. And you may be able to move them out of the way enough. Another thing to do is to remove the foot pad from the bottom of the tongue jack. These are usually connected with a pin. Once removed, you should be able to move the jack up and down since it is only a pole at that point. Then you reinsert the foot pad after the jack has cleared the bars.
Cost
This is probably the biggest con for the hitch. I don’t think people can justify spending about $2,500 on a hitch. Well, the only thing I can say about that is that for the peace of mind the hitch provides. $2,500 is a small price to pay.
Overall, I am really impressed with the ProPride 3P hitch. And recommend it to anyone that is looking for the best travel trailer hitch. The sway control, quality of build and customer service are second to none with this hitch!
For more information on ProPride 3P and for their other towing accessories, check out their website at https://www.propridehitch.com/.
Check out more RV posts on our site:
21 RV Apps That Are Super Helpful For Your RV Trip
Why A Slide Topper Is An Amazing Accessory For Your RV
Why Having An RV Surge Protector Is An Absolute Must!
Pin this for later:


- 31 Amazing RV Upgrades You Can’t Live Without - July 9, 2024
- 8 Breathtaking THINGS TO DO Near Yellowstone National Park - May 22, 2024
- Utah National Parks Road Trip: All 5 Parks & More [Map Included] - May 11, 2024
DISCLOSURE: This post may contain affiliate links, meaning I get a commission if you decide to make a purchase through my links, at no cost to you. Please read my disclosure for more info.
